
The AEBN Theater Builder tool allows you to customize the look and the content offered in your theater. Through it, you can apply a customized “skin”, make changes to the color of your theater, change the banner logo, adjust the content settings and define the site name for your theater. This guide will walk you through the many options available in Theater Builder and explain the functionality of the tool.
To load Theater Builder, log into the Webmaster’s Area of AEBN.net and click the Theater Manager link on the top navbar. Next, select the theater you wish to work with and click Edit. If you have no theaters created click to create a new one.
Theater Builder walks you through the process of creating or editing a theater by using different sections.
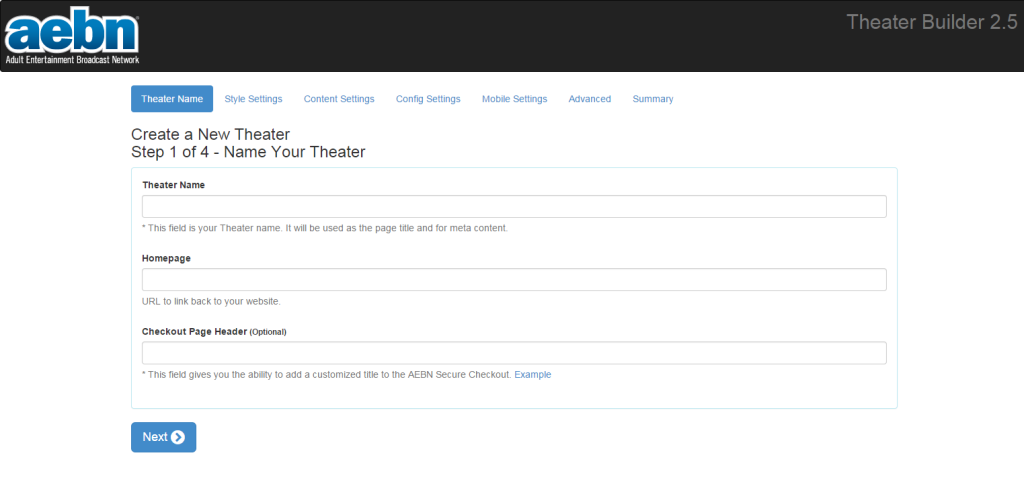
Theater Name
Title:
The title of your theater will appear in the upper left of the browser window. Your title can contain the name of your site or niche, but could be anything you like. The title will appear within the HTML <title> tags of the theater.
Homepage:
The homepage is the return web address where you would like to direct users when they click the banner of your theater. If your theater has no banner you will see a text link that says “Click here to return to” and then whatever text you have placed in the Title field.
This is an easy way for users to return to your site from the theater, so normally this is your parent website address such as www.aebn.net. Please note that you need to include the http:// as part of the address.
Style Settings
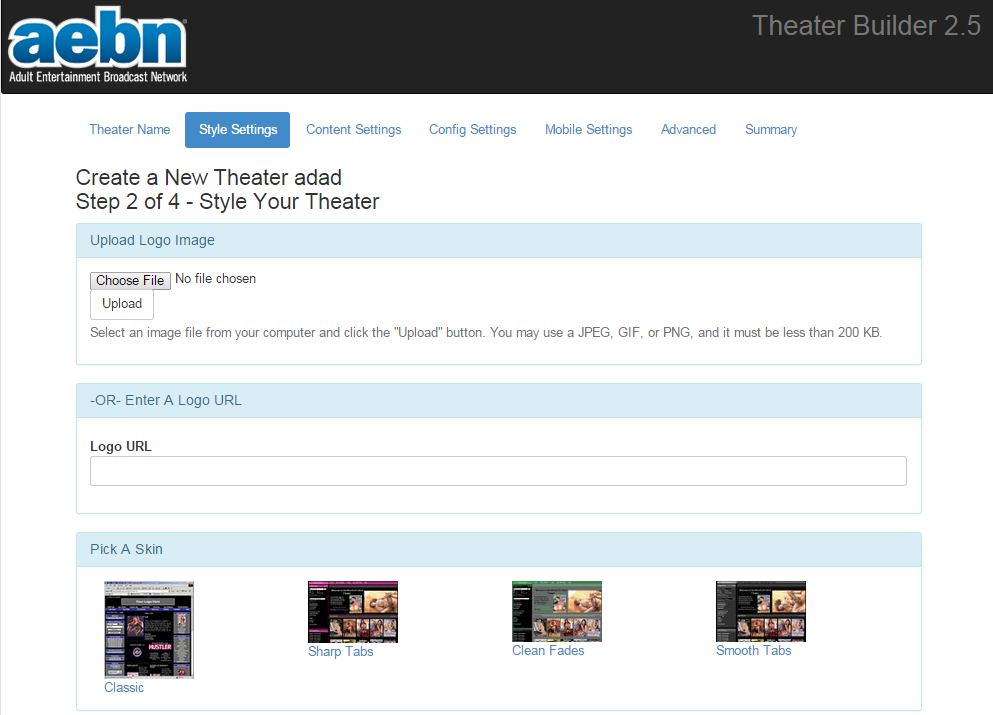
Pick A Skin:
The Style Settings page allows you to pick one of the pre-made skins to colorize your theater. Each skin offers different colors and tab styles to easily generate a professional looking theater with the click of a button. Webmasters with an existing site a custom made theater should not choose one of the skins, as it will overwrite your existing color settings.
Add Your Logo:
You can also host your own logo image as the banner for your theater.If AEBN created a custom theater for you, a logo URL will already be listed.
Add Your Favorites Icon:
The favorites icon is the graphic seen in the address bar of the browser, it can be in ICO or JPG format.
If you select the Advanced Style Settings you will be presented with more options for customization.
Advanced Style Settings
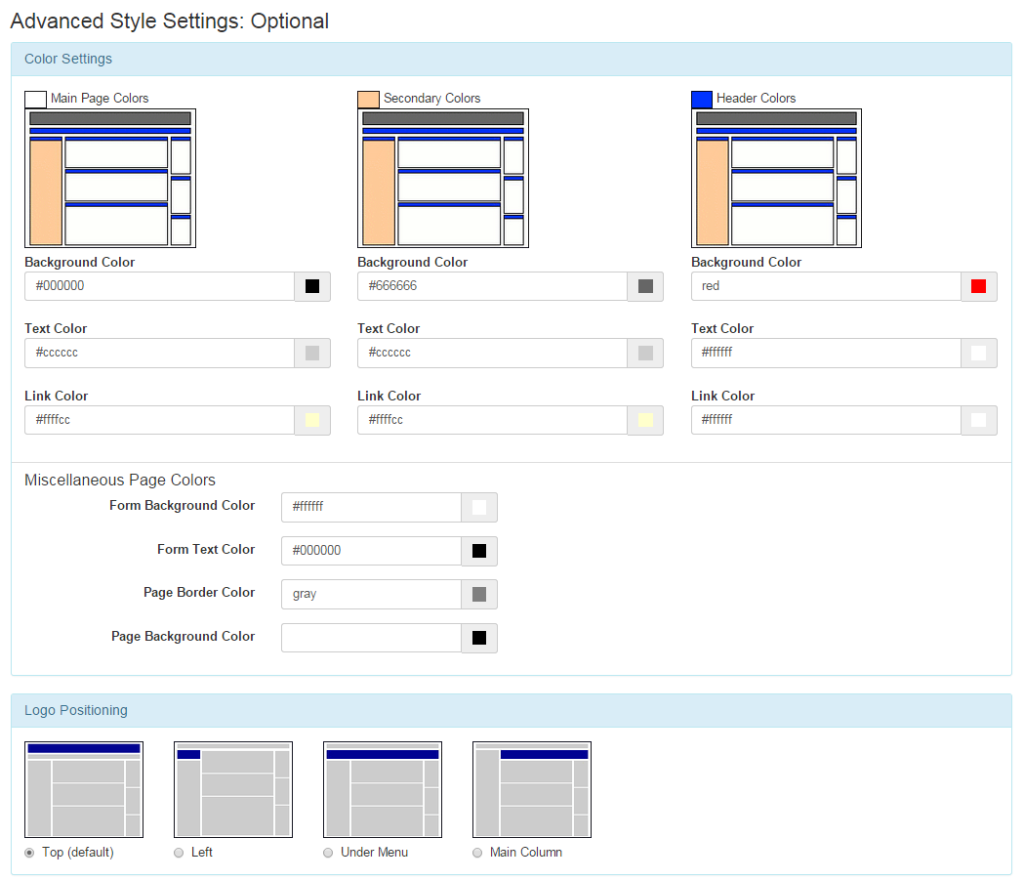
Logo Positioning:
You are able to change the position of the banner for your theater. Normally the banner is at the top and spans the width of the theater, but you are able to adjust the position of the banner and the navigation bar using one of the four choices.
Color Settings:
If you wish to make changes to the color of your theater you can enter the color codes you would like to use. Text and hyperlink colors as well as background colors can be adjusted from this screen. You can either choose the color from the color picker or you can type in the HTML color code.
Please keep in mind, there is no “undo” function for changing the colors. Write down any color code changes you make so you can revert the theater back to its original color scheme if needed.
User CSS:
For users who are versed in coding Cascading Style Sheets, a custom CSS file can be loaded to color and format the theater. The CSS file will need to be loaded from your server so you will need to specify the full URL to the file location.

Copy Style From Another Theater:
Theater Builder allows you to copy the formatting from another theater without manually entering all the color codes. Simply enter the TheaterID number in the entry box and click Copy. Your color codes will be brought over and the CSS file from that theater will be applied. This allows you to create one theater style and use it on multiple theaters as well as gives you’re the opportunity to test different designs without affecting your main theater. Please be aware this should be used for theaters you own or have been testing.
Background Image:
You can specify the URL of a background image you wish to use with your theater. This could be a logo or specific pattern associated with your site. This file will need to be hosted from your server.
Webmasters who had their theaters created and formatted by our design team will not normally need to use the options on this page. The logo, banner position and CSS file location will be entered when the theater is created.
Content Settings
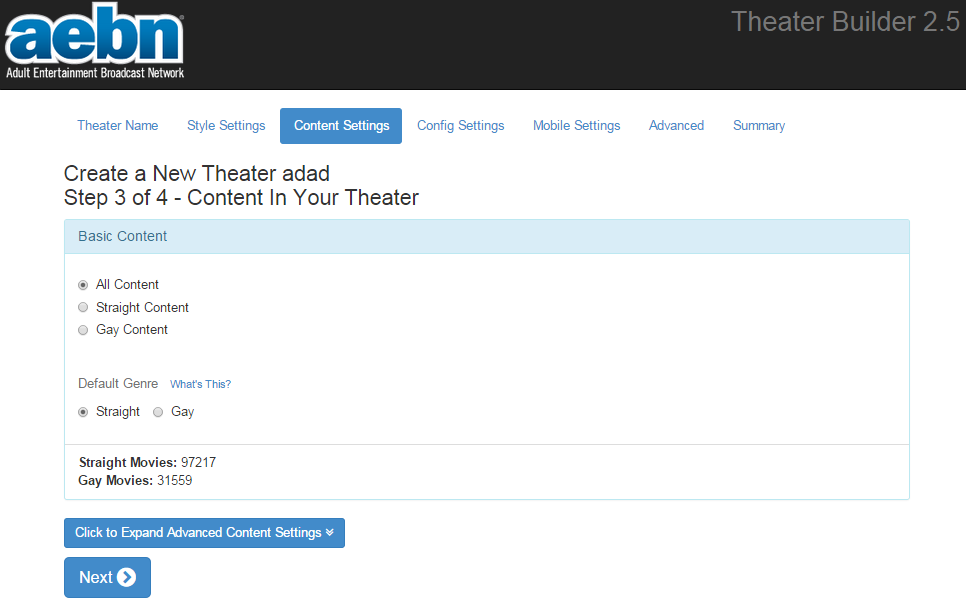
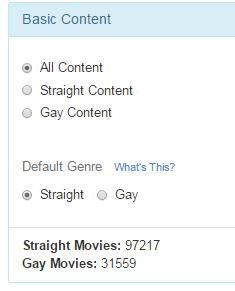
Basic Content:
In simple terms the content of your theater can be Straight, Gay or Both. You can set a default genre and limit which content is shown. As you make your selections you will be shown how many movies are available. As you will see, there are several Advanced Options which can affect the content so please make sure this number is greater than 0 or no content will be shown in your theater.
Also keep in mind, selecting Straight Content and a Default Genre of Straight will only give you straight content. You will not have a Gay titles in your theater.
Advanced Content Settings
When you click to expand the Advanced Content Settings you are presented with many choices that affect the content of your theater. By default your theater displays all the content from our catalog. If you wish to limit the content offered to a specific niche or category, Studio, Star or Director, you can use the following options.
Please be careful when including content from multiple categories. The different sections are combined with the “AND” operator. For example, if you chose a category, a star and a studio to include, that star would need to have made movies for that studio and those movies need to be listed in the chosen category. Choosing options from multiple sections will limit your movie selections very quickly.
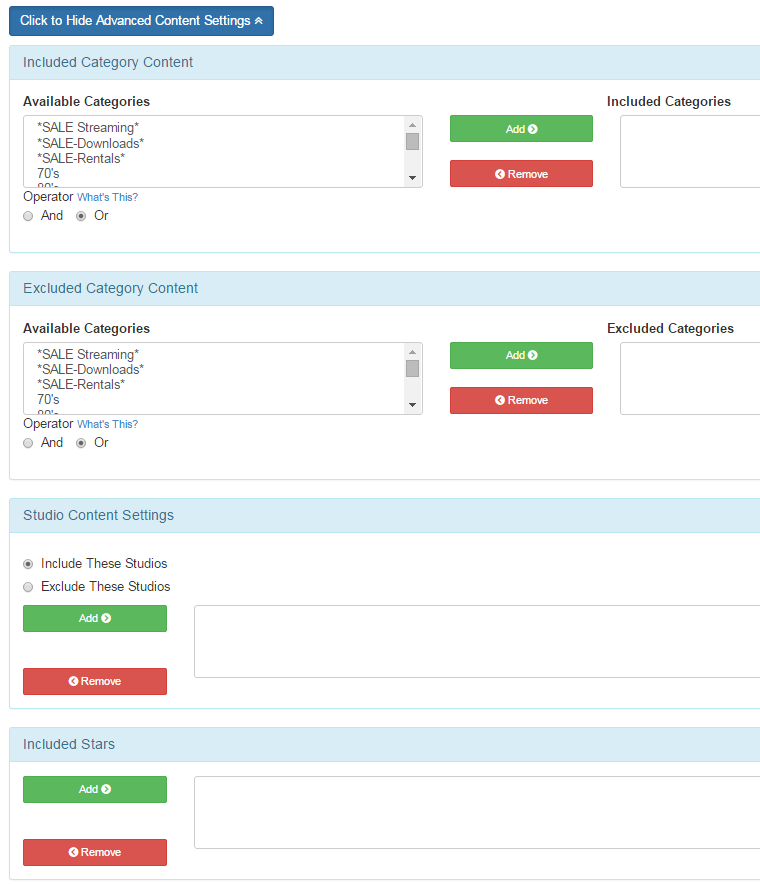
Included Category Content:
Select which categories you want in your theater. For example, you can select a single category or select multiple categories that are similar. Only movies that have been marked with this category will be displayed to your theater viewers.
If you want to include everything but a few categories, use the Exclude category for easier maintenance.
Excluded Content Category:
Can be used to remove content from your theater.
If you want to exclude everything but a few categories, use the Include category for easier maintenance.
Studio Content Settings:
Include or exclude content from certain studios. This can be used to promote or feature certain studios you may have a relationship with or you can remove studios you are already offering in another part of your site.
Included Stars:
Include certain stars within your theater. This can be used to highlight certain stars of a particular era or feature stars with similar characteristics such as classic starlets or newcomers.
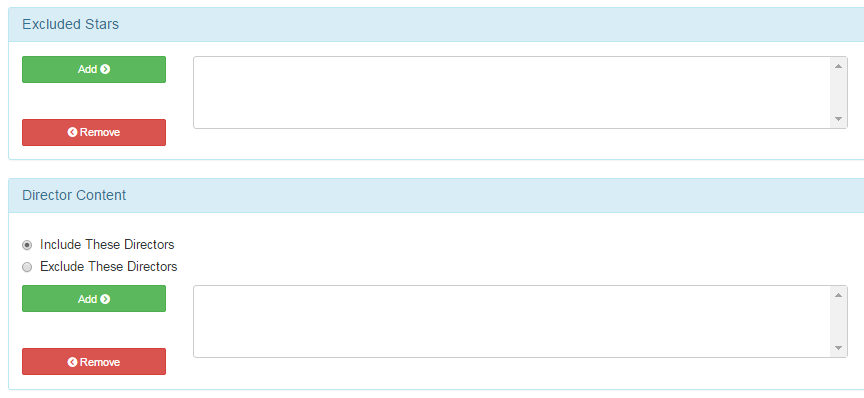
Excluded Stars:
Exclude stars from your theater.
Director Content:
Include or Exclude particular directors. Again this could be used to highlight certain directors who have a similar style or remove directors based on contractual obligations.
When building a content filter it may take several minutes to a few hours before that content is available on the theater. A list needs to be generated of which content to include and exclude. If this is the first time you are creating the theater it may appear blank until the content list is generated. The more filter options you choose the longer it will take.
As noted, at the top of the page you are shown how many movies match your criteria. If your filters contradict each other you will see 0 for the number of movies in your theater. If this happens you will need to remove some of your filters or exclusions.
Config Settings
When first presented, the Config Settings page allows you to pick the sample video that will be shown in your theater. The Advanced Config Settings present with a great deal more options such as a Front Page Content Settings, a CNAME for your theater, whether or not to show explicit images and even the option to add a Welcome Message to your theater.
These options are explained in more detail below.
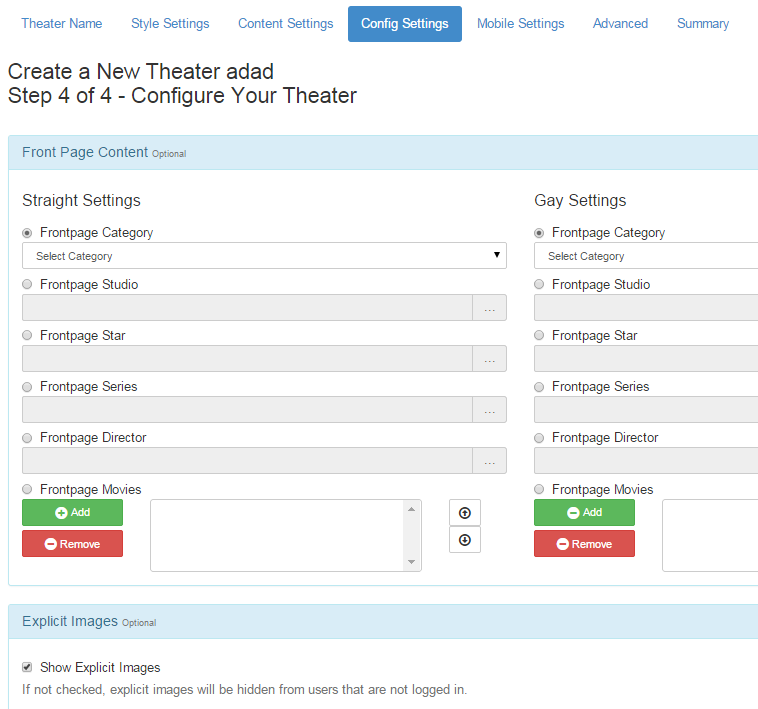
Front Page Content:
The front page content refers to the movies that are presented on the main page of the theater. By default these movies are selected based on the content settings of the theater, however you are able to make your own choices so you can feature certain movies.
Similar to the previous page you are able to select movies based on Category, Star, Studio, Series or Director. Please keep in mind you can only choose one name when using these choices. For example, you can only pick one studio, or one series from the list, so you should make sure there are plenty of titles for users to browse through.
For Frontpage Movies you can select up to 42 individual titles with a minimum of 5. You can either choose the movies by their titles or if you have a list of movie IDs, that can be entered as well.
If you choose less than 5 movies, no frontpage movies will be displayed. You will need a minimum of 5, 1 for the Featured Movie and 4 to complete a row of selections.
Explicit Images:
If you wish to hide the box covers for the more hardcore titles you can check this option. A “too hot” graphic will be displayed until the user signs in and creates an account.
Advanced Config Settings: CNAME Options

By default a theater is available through the web address http://theater.aebn.net/dispatcher/frontDoor?theaterId=XXXXXX, however this is not easy to remember and isn’t consistent with the naming structure of the parent website. You can use a CNAME to give your theater a URL that more closely matches your site.
Enter the web address for your theater without the http:// prefix to the address. The http:// will be taken as part of the actual address and your theater will not load correctly.
For additional information on CNAMEs and setting them up, please see our Affiliate Guide on how to set up a CNAME.
Welcome Message:

Theater Builder offers the ability to create a Welcome Message which can be used to welcome users to your theater, provide additional information about the theater or links back to your site. You can use standard text or you can use HTML to add graphics and formatting. The welcome message appears at the top of the theater just below your banner so keep this is mind when adding additional information.
Google Analytics:

We have added the ability to use Google Analytics with your custom theater. All you need to do in order to use Google Analytics on your theater is add the code tracking number into the line provided. The tracking number is found within the JavaScript Google generates when you sign up for an Analytics account and is easily identified by its UA-XXXXXX-X format.
Meta Data:
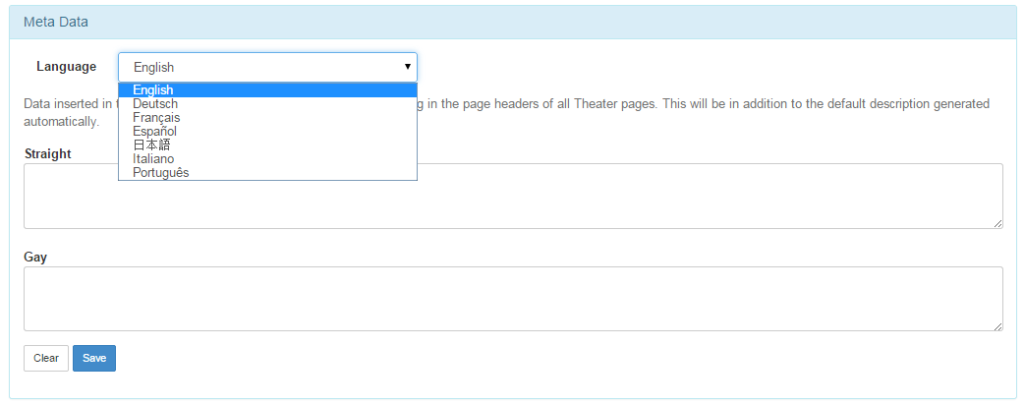
The Meta Data section gives webmasters the ability to add Meta Tags for Keywords and Description to their theaters. Text can be entered in for each genre and in multiple languages.
Keywords and Description meta tags are picked up by search engines and can be used to help optimize your site for the web.
Please note that the keywords and description you add will be placed after the default keywords and description of the theater rather than replacing it.
Summary
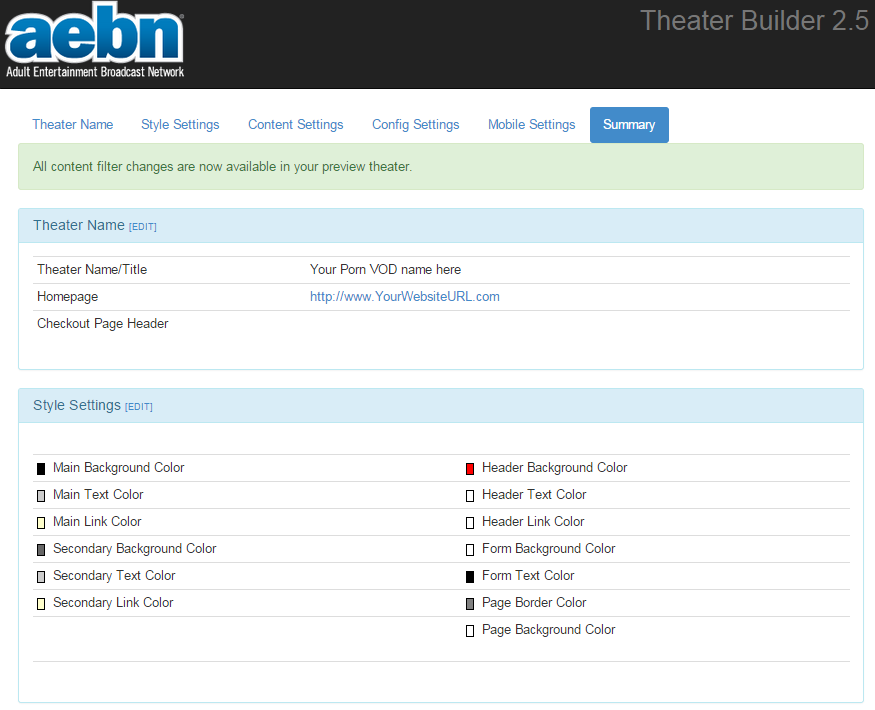
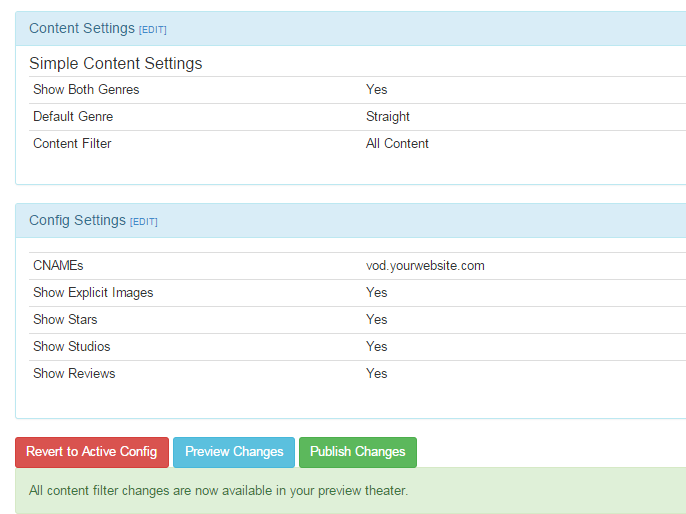
The summary page is exactly that, you are given a summary of the options you have chosen for your theater, the content, the CNAME, colors and free clips. At a glance you can see the web address your site is using, your homepage and you can click the links to preview your theater on the web.
Note, you need to click “Publish” in order for your changes to take place. You may Preview your content and color changes but they will not be seen in the theater until the changes are committed by Publishing your site.
Content Export:
The content export feature gives you a downloadable CSV file which lists each of the movies that are available in your theater. The file lists the URL to the theater, the Title and stars in the movie. The CSV file can be used to generate links to the movies from a blog or discussion forum.
The content export is a separate function of the theater and may be required by more advanced users who have a specific need for links to the movies in their theater. You do not need to create an export for your theater to function correctly.
Points to remember when working with Theater Builder
As you make modifications to your theater please keep the following in mind; many of the changes do not have an “undo” feature and several will not update until you publish your theater.
Style Settings:
- You can make changes and adjust color settings which will not effect a live theater when viewed through the Preview option, however, there is no “reset” button to put the colors back to their original state should you change your mind about the colors. There is not an “Undo” to your changes.
Under Config Settings:
Advanced Config Settings: Optional
c) CNAME
- When setting the theater up for a CNAME such as VOD if you type in http://vod.sitename.com versus vod.sitename.com the theater will default to the AEBN 822 theater and not the custom theater. You should not include the http:// as part of the site name. This is taken as a literal string.
Under Content Settings:
- Including or excluding categories may take several hours before the results are calculated. A preview will show a “blank” theater. The free daily clip will be at the top but there will be no content visible. If you “Publish” the theater in this state it will also be blank. This is clearly visible for brand new theaters which haven’t been published before.
- Once the Content Filter warning is displayed indicating the content filter request has been submitted, it is not displayed again. It does not keep appearing until the request is complete, meaning once you change screens in Theater Builder the message is gone. This is not an indicator that the filter is ready to be used.
- Within each section under Content Settings you can include or exclude Stars, Studios, Directors, etc. In each of these the section the “OR” operator is used such as, you want to include movies which features Jenna Jameson, or Celeste, or Eva Angelina. And you can do the same for studios, such as, you want to feature movies by Wicked or Vivid. However, when you combine these two sections it becomes an AND clause meaning you are looking for movies by Wicked or Vivid which stars Jenna Jameson, Celeste or Eva Angelina. This doesn’t sound too bad IF the stars worked for that studio. However if you were to choose Eva Angelina AND Vivid Studios you will get 4 results since she has only made 4 movies for that studio. You will not see all the movies from Vivid and all the movies with Eva Angelina in them. What you will get is all the movies from Vivid which Eva Angelina is a star.
- If you take the above example a step further and select a Frontdoor Category that does not match your chosen filters your theater will be blank. For example choosing Vivid as the studio, Eva Angelina as the star and then Babysitters as the Frontdoor Category you will get a blank theater. Out of the 4 movies Eva has done for Vivid none are in the Babysitters category.
Deactivated Movies:
- If you wish to hand pick the movies which appear on the Frontdoor of your theater, you may want to periodically check to make sure these movies are still active. If a movie is no longer available, but is still selected to display on the Frontdoor an error will occur notifying the user that the webmaster has been informed and that they need to call customer service. In some cases the recommended movies will continue to display, other times they don’t. For many users they see the top of the theater with a large triangle and exclamation point in it and then rest of the theater becomes blank. The offending title needs to be removed from the list. It will appear with its movie ID rather than the movie title. As a side note if you view the source code of the theater within the browser the ID of the archived movie is displayed.
Summary Page:
- You must “Publish” the theater with any new content changes before requesting a new Content Export. The same results will be returned each time unless the theater has been published. The content filter is based on the content for a live theater.